Saturday, Oct. 10, 2026
Been a while since I posted, but I’ll update what’s been going on.
FOR STARTERS … While cleaning up the shop, I found that one of the pieces used to attach the tail gate cable to the tail gate, which meant that the vintage (original) one was still on the car. I had time, so I thought I would lower the tail gate, clamp off the cable on that side, remove the old hardware and install the shiny new chrome one.
That went well until I was wrapping up the swap and lowered the tail gate and inadvertently had the end of the support cable pull loose from the ball mount. Yikes!
Fortunately, I still had vice grips clamped on the cable. I removed the ball socket from the tail gate fixture and took it to the bench vise. I took a hammer and gingerly hammered the disfigured lip of the ball mount back into proper position. Then I placed the ball socket in the vice and slowly and carefully smashed the ball parts back together. In other words, I used the vice to help close up the slot that allows the cable to mount and feed up into the hole in the top each of the tail gate opening.
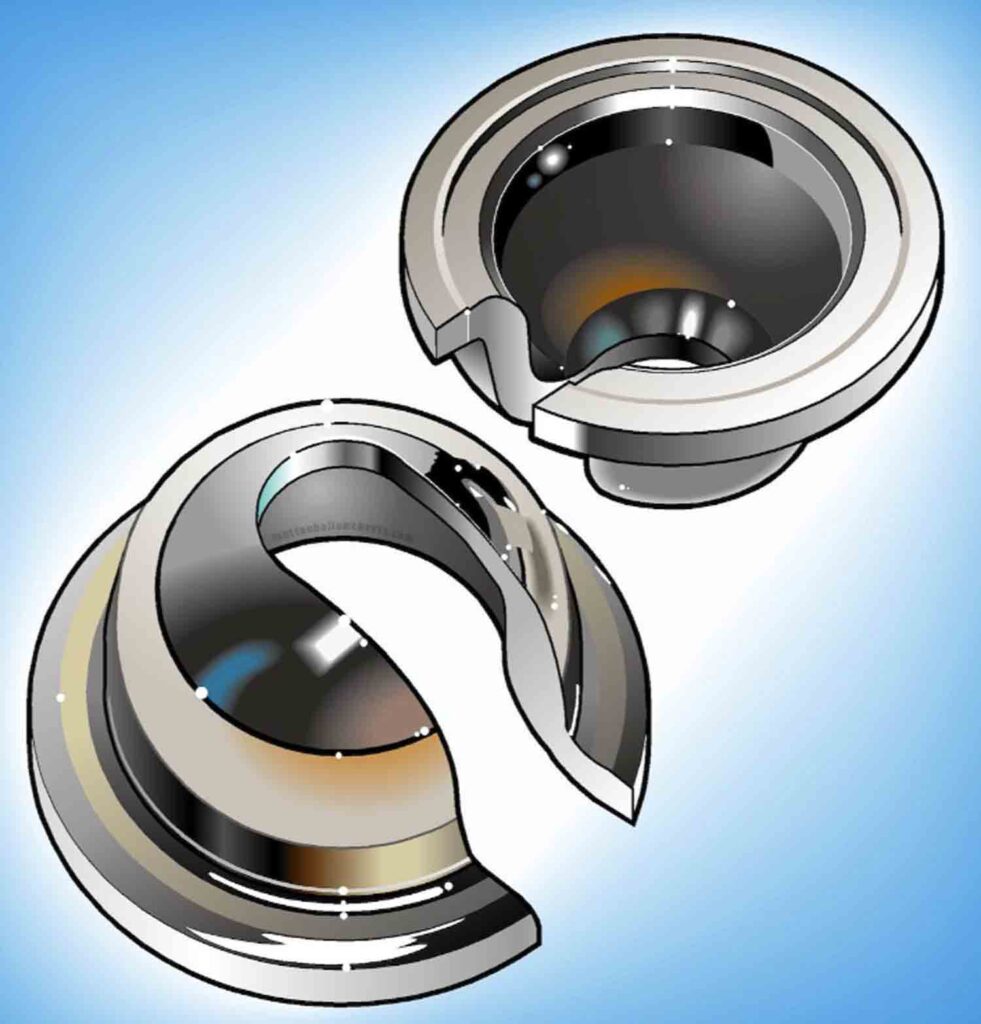
Anyway, I cranked down on the vise pretty intently, so it means that it is unlikely that the ball at the end of the support cable will pull free again.
I’ve decided that when new ball sockets are available for purchase, when I remove the existing ones, I play to smash the new ones in the bench vise to help reduce the chance they’ll pull free like happened with the existing ones.

CARGO AREA WORK AWAITS. I was busy every evening this week with political debates. Thankfully that shit is done, and I’m going to return my focus to the wagon’s cargo area.
STEP 1: LOWER BACK SEAT. The wagon’s back seat was courtesy of a 1955 Nomad. I need to flatten the seat and then remove the original vinyl that’s still on the back/bottom of the sections of the seat. Both have the original 1/2-inch plywood intact, they just need to have the vinyl removed, as well as any original trim those parts might still have.
STEP 2: MOUNT NEW VINYL. I think I have most of the vinyl I will need to cover the entire cargo area as well as the bottom/back of the back seat once it is flattened.
I’m going to have my son try to find the original mounting holes for the plywood in the floor of the cargo area. At that point, I plan to snap a line to mark the cargo area’s center line. From the center, I’ll start laying the tile, gluing the tiles that don’t want to adhere properly.
There’s also the deal about access to the upper shock absorber mounts. The factory had metal covers over those access points. I plan to cut a rectangle out of the plywood floor and have it held in place with magnets epoxied to the bottom of the plywood rectangle. The top will be covered with the same vinyl flooring as the rest of the cargo area.
I don’t have the metal trim to go around the flooring edges or the spare tire cover, so I’m going to wind up using some aluminum 1/2 inch right-angle trim. That should work just fine.
Should.
Once I have the cargo floor mounted and the vinyl on the rear seat back and bottom, I will have to decide how to deal with the wheelwells. I have a couple rolls of what amounts to black-and-white wall paper that I could apply to the wheel wells. Or I might just paint the wheelwells flat black. I could also cover them with the black vinyl diamond upholstery fabric I have or the door and side panels.
STEP 3. WINDOWS TINT. I have window tint material to apply to side windows and the tail gate windows. I have already removed and painted the cargo area garnish moldings, and they’re ready to roll.
I have already cut a template to prove that the rear quarter windows should be able to be covered with a single piece of tint material. I’m anxious to see what the car looks like with the rear windows tinted. I’ve never applied window tint, so this may be an experiment that will require an additional roll or two of window tint material.
Anyway, its all in the plans.
FUTURE STEP: A/C INSTALL. I plan to buy an under-$600 belt-driven A/C kit to install in my wagon. To do this, I plan to relocate the alternator to the driver’s side of the engine to make way for the A/C compressor on the passenger side.
Another part of the install is to remove the original heater core. The heater core fan doesn’t work, and the cables that direct the airflow through the heater core are rusted and frozen in their guides. The heater core is easy to remove, so its advantageous to remove it and make more room for the under-dash evaporator.
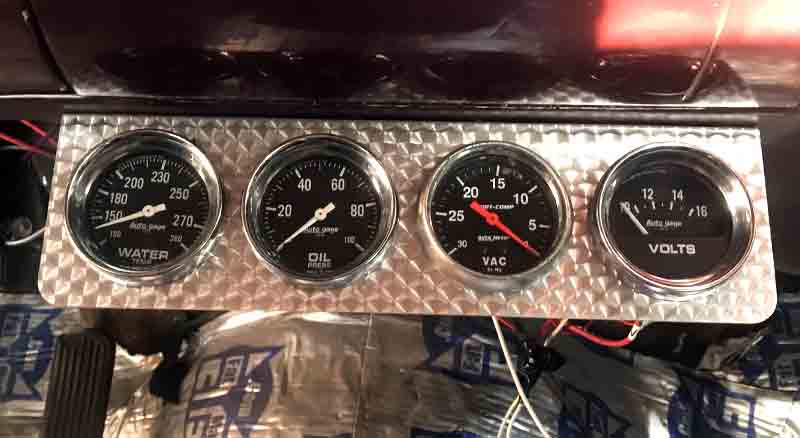
GAUGE PANEL RELOCATE. Yeah, chances are that I’ll have to shift the underdash gauge panel closer to the driver’s side to make sufficient room for the underdash A/C system. Not my first choice, but I’ll only move it if there’s no way to fit the underdash system.
OTHER IMPROVEMENTS AWAIT. Of course, there’s more work in the wings, including things like:
- Carpet
- Door panels and rear side panels
- Glove box install
- Possible repair of the original radio
- Install new quartz clock
- Dual quad intake
- 2 new Edelbrock 600s
Well, more work to do … it all just takes time … oh, yeah, time AND money!
Related Posts

Anger still within over failed Tri-Five Nats trip …
Saturday morning, Aug. 15, 2026 Today is the last day…

Home from the heat & the Tri-Five Nationals …
Aug. 30, 2025 Been a while since my last update,…
Gauge install completed, blown fuse fix ahead …
Friday, July 25, 2025 Today I made progress on my…